
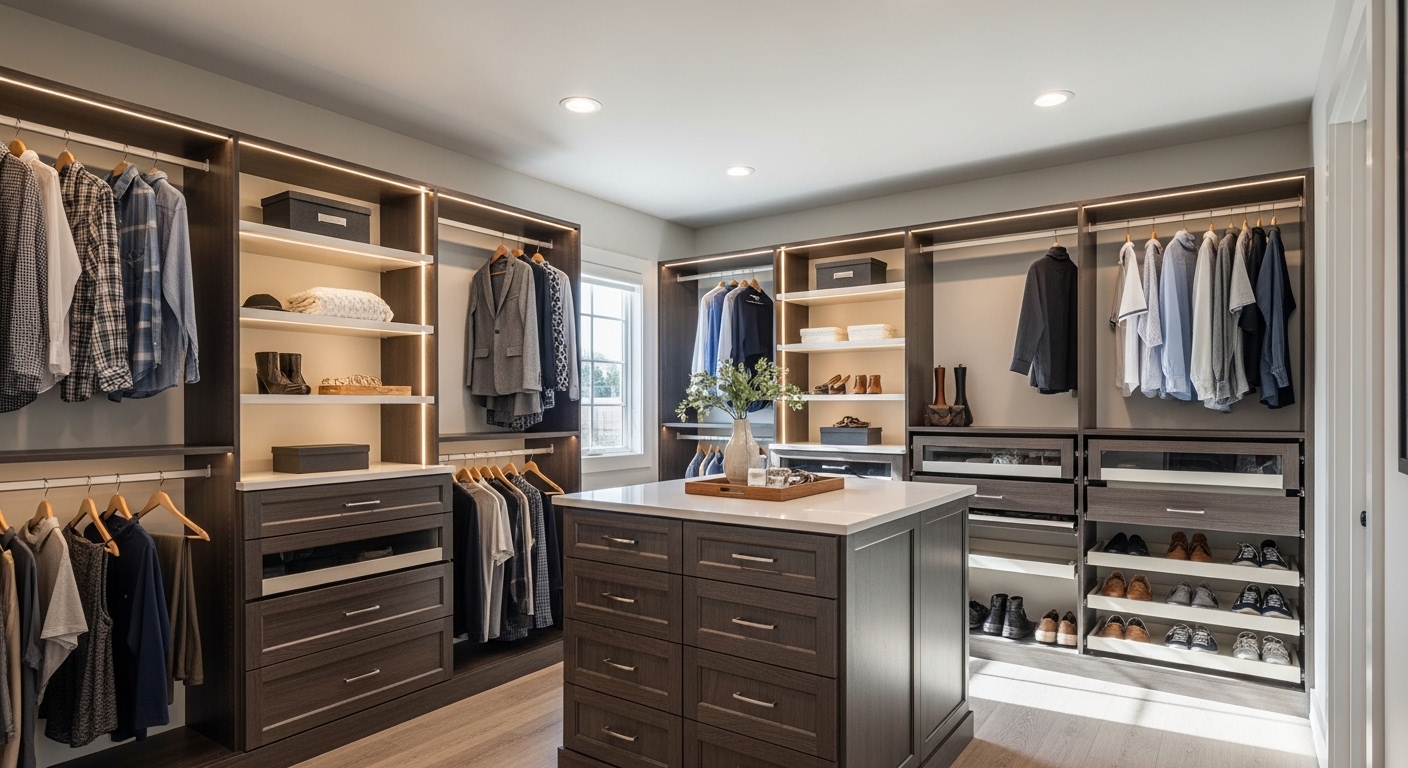
There’s a specific kind of frustration that lives in a bad closet.
It’s not dramatic. It doesn’t announce itself. It’s just there every morning — the pile of shoes you have to move to reach the ones you want, the shelf that’s too high for anything useful, the rod that’s packed so tight everything is permanently wrinkled. You close the door and you don’t think about it again until tomorrow, when the whole thing repeats.
And then one day you open a friend’s closet to hang up a coat and you just… stand there for a second. Because their closet actually works. Everything has a place. There’s room to breathe. And you think: why doesn’t mine look like that?
That’s usually where the custom closet conversation starts.
If you’re a homeowner in Pasadena thinking about a custom closet installation — whether it’s your master bedroom, a hallway linen closet, a home office, or a pantry — this guide is meant to walk you through what the process actually looks like, what it costs in this area, and what to think about before you commit to anything.
No fluff. Just what you’d want to know from someone who’s been through it.
Before You Start: What “Custom Closet” Actually Means
This matters because the term gets used a few different ways, and the difference affects both your budget and your outcome.
Modular closet systems — think California Closets or the IKEA PAX style — are pre-designed components that get configured to fit your space. They’re faster and less expensive, but you’re working within the limitations of what’s already been manufactured. If your closet has an unusual dimension or a soffit or an angled ceiling, the fit is often imperfect.
Semi-custom closet systems give you more design flexibility with standardized components. Better fit, more finish options, still somewhat faster to produce.
Fully custom built-ins are designed and built specifically for your closet — your dimensions, your layout, your wood species and finish. Nothing pre-made, nothing forced into a shape it wasn’t designed for. This is what a local cabinet shop like Ace Kustoms does for Pasadena homeowners — designing and building a closet system around your actual space, not the other way around.
Most people looking for a “custom closet” end up somewhere on the spectrum between semi-custom and fully custom, depending on budget and complexity. Knowing which tier you’re actually shopping for changes your expectations and your price range significantly.
Step 1: Figure Out What Your Closet Actually Needs
This sounds obvious, but it’s where most people go wrong. They focus on what they want it to look like before they’ve figured out what they need it to do.
So before you call anyone, spend 10 minutes with your current closet. Ask:
- What do you store here that doesn’t have a good place right now?
- What do you reach for every day, and where is it currently?
- What’s the thing that frustrates you most? (The answer to this is usually your first priority.)
- Do you share this closet? If so, does each person need a dedicated zone?
Write it down. Seriously. The difference between a closet that works great and one that just looks great is whether the design started with how you actually live.
[IMAGE: Before photo of a typical Pasadena master closet — single rod, one shelf, shoes on the floor]
Some common patterns worth knowing about:
Most people have too much hanging space and not enough folded storage. The standard builder closet is a single rod with one shelf above it. It’s great for hanging clothes and almost nothing else. Most wardrobes are a mix of hanging items and folded items, so the ideal closet has both — in proportions that match how you actually dress.
Shoes are almost always underestimated. A family of four can easily have 40–60 pairs of shoes floating around the house. Dedicated shoe storage — shelves angled at 15–20 degrees, cubbies, or pull-out drawers — is one of the most life-changing things you can add to a closet.
Drawers inside the closet beat a dresser in the bedroom for most people. If you can get drawers built into your closet system, you’ll likely use the bedroom floor space for something better than a dresser you’re constantly rearranging.
Step 2: Get a Real Measurement (Not Your Best Guess)
A custom closet installation starts with accurate dimensions. Not ballpark, not “about 8 feet wide” — actual measurements.
Here’s what you need:
- Width of each wall, measured at floor level and again at shoulder height (walls aren’t always perfectly plumb)
- Ceiling height, including any soffits or angled sections
- Location of any outlets, light switches, or HVAC vents on the closet walls
- Door swing direction and clearance
- Whether the floor is level (it often isn’t, especially in older Pasadena homes)
You don’t have to do this yourself — any good installer will take their own measurements before finalizing a design. But having a rough sense of your dimensions helps you have a smarter conversation and gives you a basis for comparing quotes.
Pro tip: Measure the door opening too, not just the closet interior. In older homes especially, closet doors can be surprisingly narrow — which matters for how built-in components get installed.
Step 3: Choose Your Design Direction
Once you know what you need and how much space you have, it’s time to think about the actual design. This is the fun part, but it’s also where people sometimes lose track of the practical priorities they established in step one.
A few design decisions that affect both cost and function:
Double-hang vs. single-hang sections. Double-hanging (two rods, one above the other) is great for shirts, jackets, and shorter items. It gives you roughly twice the hanging capacity in the same linear footage. Single hang is better for dresses, suits, and long coats. Most closets benefit from a mix.
Tower sections. A tall center tower with drawers and shelves is usually the anchor piece in a walk-in closet. It’s where folded items, accessories, and small bins live. Getting the drawer count right matters — too few and you’re still digging through piles; too many and each drawer is only half used.
Open shelving vs. closed cabinet doors. Open shelving is less expensive and easier to access quickly. Closed cabinets look cleaner and hide less organized storage. A lot of designers will mix both — open for everyday items, closed for things that don’t need to be visible.
Finish and material. In a fully custom closet, you’re choosing the actual material — painted MDF is popular because it’s smooth and photographs well; melamine-coated particle board is more affordable but less durable; real wood veneer or painted hardwood is the high end. The finish you choose affects how the closet feels to use every day and how it holds up over time.
[IMAGE: Split image showing open-shelf tower on left vs. closed-cabinet tower on right in same closet configuration]
Step 4: The Quote and Design Process
Once you’re working with an installer, here’s roughly what to expect:
Initial consultation — usually a site visit where the installer takes measurements, asks about your needs, and talks through options. A good installer will ask you questions, not just show you a catalog. If someone hands you a price without seeing your closet and understanding how you use it, that’s a yellow flag.
Design presentation — most custom closet installers will produce a 3D rendering or at minimum a detailed drawing showing the proposed layout, component list, and finishes. This is your chance to make changes before anything gets built.
Revision round — expect at least one round of revisions. That’s normal. If the first design is perfect on the first try, either you gave very clear direction or something was assumed without being asked.
Final quote — once the design is locked, you get a final price that accounts for materials, fabrication, and installation. Get this in writing, obviously.
Timeline from initial consultation to installation is typically 3–6 weeks for custom work. If someone promises you a custom closet in a week, ask more questions.
What Does Custom Closet Installation Actually Cost in Pasadena TX?
Let’s get into the real numbers, because vague ranges don’t actually help you plan.
Small reach-in closet (4–6 linear feet): $800–$2,500 for a semi-custom system; $1,500–$4,000 for fully custom built-ins. This is a hallway closet, a kid’s bedroom closet, or a small master in an older home.
Standard walk-in closet (8–12 linear feet of wall space): $2,500–$6,000 for semi-custom; $4,000–$10,000+ for fully custom. This is the range most Pasadena homeowners are working with for a master bedroom upgrade.
Large walk-in or his-and-hers (12–20+ linear feet): $5,000–$8,000 semi-custom; $8,000–$20,000+ custom. Larger footprint, more components, often includes an island or built-in seating.
Pantry closet conversion: $1,500–$5,000 depending on size and complexity. Pull-out shelving, dedicated zones for appliances, labeled bins — this is one of the most functional upgrades you can do in a home.
What drives the price up:
- More drawers (drawers cost more to build than shelves)
- Specialty hardware (soft-close drawer slides, pull-out shoe racks, valet rods, built-in lighting)
- Premium finish materials (real wood vs. painted MDF)
- Complex geometry (angled ceilings, multiple door openings, soffits)
- Larger closet footprint (obviously)
What keeps it more affordable:
- Open shelving instead of closed cabinets
- Painted MDF over real wood
- Fewer drawers, more shelves
- Simple rectangular layout
Ace Kustoms can walk you through exactly what the cost would look like for your specific closet in Pasadena — it’s a real conversation around your actual space, not a generic number pulled from the internet.
Step 5: Installation Day — What to Expect
Installation of a custom closet is usually 1–2 days for a standard walk-in, occasionally 3 days for a large or complex build. Here’s what that process typically looks like:
Day one morning: The installer removes everything from your existing closet and takes out any existing components (old rod, shelf, brackets). In most cases, there’s minor patching and painting to the closet walls before new components go in.
Day one afternoon / Day two: New components go in — usually starting with the largest pieces (towers, base cabinets) and working toward the smaller fill pieces and finish trim. Anchoring into studs is critical; a good installer will locate studs and anchor properly, not just into drywall.
Final day: Hardware installation (pulls, hooks, valet rods), lighting if included, final level check, and a walkthrough with you to confirm everything is right.
Pro tip: Before installation day, take everything out of your closet yourself the night before if you can. It saves time and gives you a chance to edit — there’s something clarifying about pulling every item out and deciding intentionally what goes back in.
[IMAGE: Installation in progress showing tower unit being anchored to closet wall with studs marked]
Common Issues (and How to Avoid Them)
The design looked right but doesn’t quite work in practice. This usually happens when the design was drawn without a real understanding of how you dress. The solution is to push back during the design phase — ask your installer to walk through a typical morning with you. “Where do you reach first? What do you hang vs. fold?” If they can’t answer those questions about your life, the design is probably generic.
Components aren’t level or plumb. This is an installation quality issue. Good installers use a level constantly and shim where needed. If something looks off during the walkthrough, say so before the installer leaves.
Hardware that doesn’t function smoothly. Soft-close drawers that slam, shelves that bow under normal weight, doors that don’t align properly — these are signs of undersized hardware or cheap components. Ask specifically about the hardware brands being used and whether drawer slides are rated for the intended load.
Not enough lighting. Standard closet lighting (one overhead fixture) is almost never enough for a well-used walk-in. If your installer doesn’t bring up lighting, bring it up yourself. LED strip lighting under shelves and in hanging sections makes the closet dramatically more usable, especially in the early morning.
Expert Tips Worth Knowing
Build for where you’re going, not where you are. If your wardrobe is going to grow, build in more hanging space now. If you’re thinking about working from home long term, consider a built-in desk zone. Custom closets last 15–20 years — design for the next decade, not just right now.
The island is worth it if you have the space. A center island in a large walk-in adds folded storage, a surface for laying out outfits, and a place for a mirror — and it makes the whole closet feel more intentional. If your walk-in is at least 8 feet wide, it’s worth asking about.
Adjustable shelves matter more than you think. Fixed shelves look cleaner in renderings but don’t accommodate life changes. Adjustable shelf pins let you reconfigure as your storage needs change without a renovation.
Paint the closet before installation, not after. If your closet walls need painting, do it before the new system goes in. Painting around built-ins is tedious and the result is never quite as clean.
Summary & Next Steps
Getting a custom closet installed in Pasadena isn’t complicated — but it does take some intentional preparation to get a result you’ll actually love living with. Here’s the short version:
- Start with how you use the space, not how you want it to look
- Get accurate measurements before any design conversation
- Know which tier you’re shopping — modular, semi-custom, or fully custom — so you’re comparing apples to apples
- Budget realistically: $2,500–$10,000 covers most Pasadena master closet projects depending on size and material
- Push back during the design phase if something doesn’t feel right — changes are cheap before fabrication, expensive after
- Plan for lighting as part of the project, not an afterthought
If you’re in Pasadena and ready to stop fighting your closet every morning, reach out to Ace Kustoms to start a conversation about what a custom closet installation could look like for your home. No pressure — just a real conversation about your space and what’s actually possible.
A closet that works is one of those small things that quietly makes your whole day better. It’s worth doing right.


Comments are closed